Last spring, I was helping my mother sort through a box of old photographs when we found it — a portrait of her parents on their wedding day, circa 1958. The image was beautiful, but a deep diagonal scratch cut right across my grandfather's face, and a cluster of fine surface marks clouded the background like a winter frost. My mother's eyes filled with tears. "I thought it was ruined forever," she said.
It wasn't. Within minutes, using a free AI tool, those scratches were gone — and so were her tears. That afternoon changed how I think about damaged photos. They are not lost causes; they are just waiting for the right fix. This guide is everything I've learned since then about how to remove scratches from old photos, whether you have five minutes or five hours.
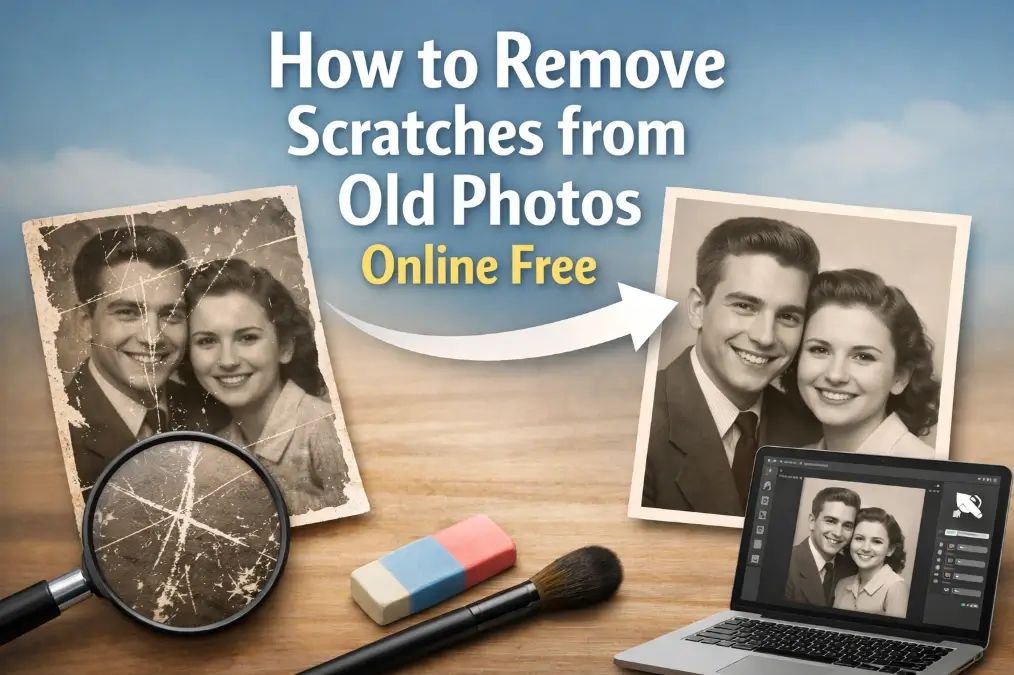
Table of Contents
- Why Do Old Photos Get Scratches?
- Types of Scratches on Old Photos: Know What You're Dealing With
- How to Prepare Your Photo Before Removing Scratches
- Method 1: Remove Scratches from Old Photos Online Free with AI (Recommended)
- Method 2: Remove Scratches with Adobe Photoshop
- Method 3: Remove Scratches for Free with GIMP
- AI vs Photoshop vs GIMP: Which Method Should You Choose?
- Special Case: Removing Scratches Over Faces
- How to Preserve Your Restored Photos (So This Never Happens Again)
- Frequently Asked Questions
- Your Scratched Photos Are Not Lost — They're Just Waiting
Why Do Old Photos Get Scratches?
Before you can fix a scratch, it helps to understand where it came from. Old photographs are surprisingly fragile objects. The image you see is held in a thin emulsion layer — a mixture of gelatin and light-sensitive silver salts — sitting on top of a paper or plastic base. That emulsion layer is softer than it looks, and decades of real life leave their mark.
The Most Common Culprits
- Improper storage: Photos stacked loose in shoeboxes rub against each other with every movement. Without protective sleeves, even gentle friction creates fine scratches over years.
- Acidic albums and paper: Many vintage albums used acidic materials that chemically attack the emulsion, causing surface degradation that looks like scratching.
- Handling without care: Sliding a photo across a table, pressing it against glass without a mat, or simply picking it up with dry, rough fingers can all leave marks.
- Environmental damage: Humidity causes the emulsion to swell and contract, making it brittle. Temperature swings accelerate this process. Photos stored in attics or basements are especially vulnerable.
- Age-related emulsion decay: Photographs from the early-to-mid 20th century used formulations that become increasingly brittle over time. The emulsion literally cracks under its own stress — a process that no amount of careful storage can fully prevent once it begins.
Understanding the cause matters because it tells you something about the severity of the damage. A scratch from careless storage is usually shallow and affects only the surface. A scratch from emulsion decay may have removed image information entirely. Both are treatable — but they respond differently to different methods.
Types of Scratches on Old Photos: Know What You're Dealing With
Not all scratches are equal. I learned this the hard way when I tried to treat a deep gouge the same way I'd treat a surface scuff — and ended up with a result that looked worse than the original. Here's the classification I now use before starting any restoration.
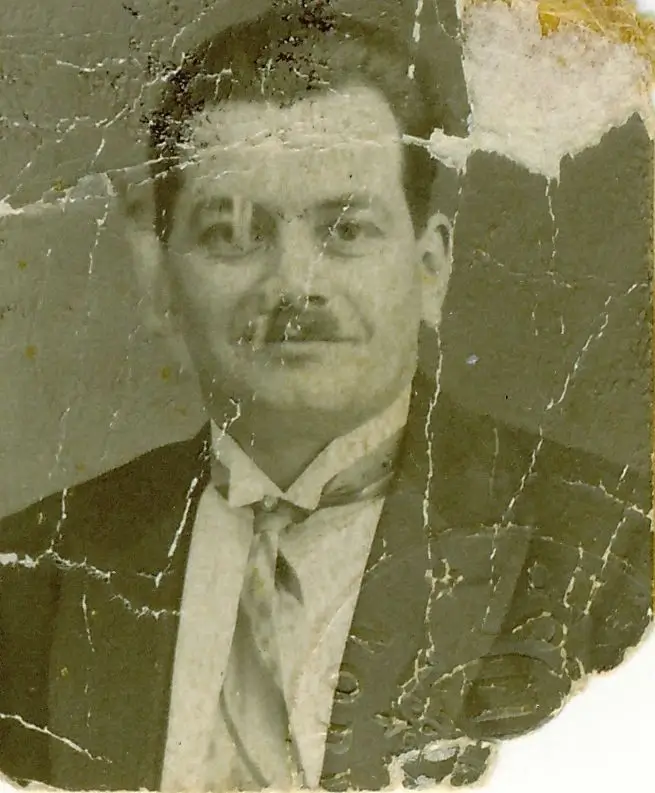
Photo Scratch Types at a Glance
| Type | Appearance | Depth | Image Data Lost? | Repair Difficulty |
|---|---|---|---|---|
| Surface Scratches | Light, thin lines; often shiny at an angle | Top protective layer only | No | Easy — AI handles these in seconds |
| Deep Scratches | Dark or white lines; visible from any angle | Through emulsion layer | Partially or fully | Moderate — AI reconstructs missing content |
| Parallel Scratch Clusters | Multiple fine lines in the same direction | Usually surface to mid-depth | Rarely | Easy to moderate |
| Emulsion Cracks | Spider-web or mosaic pattern | Full emulsion depth | Yes, in crack lines | Moderate — requires intelligent fill |
| Gouge Marks | Wide, irregular channels | Through to paper base | Yes, significantly | Hard — best results with AI + manual touch |
Identifying your scratch type before starting saves time and sets realistic expectations.
A Quick Visual Test
Hold the photo at a 45-degree angle under a lamp. Surface scratches will catch the light and appear bright. Deep scratches will look dark or show a color change — often white or cream — where the emulsion has been removed. Emulsion cracks will show a network of fine lines across a larger area. This 30-second test tells you which repair method to reach for first.
How to Prepare Your Photo Before Removing Scratches
The quality of your digital scan is the single biggest factor in how good your restoration will look. I've seen people spend hours on a restoration only to end up with a mediocre result because they started with a 150 DPI phone snapshot. Don't make that mistake.
Scanning Settings That Actually Matter
Recommended Scanning Settings by Photo Size
| Photo Size | Recommended DPI | Output File Size (approx.) | Best Format | Notes |
|---|---|---|---|---|
| Standard 4×6 inch | 600 DPI | ~12 MB (TIFF) | PNG or TIFF | Sweet spot for most restorations |
| Large 8×10 inch | 400–600 DPI | ~25–40 MB (TIFF) | TIFF | Higher DPI rarely adds useful detail |
| Wallet / 2×3 inch | 1200 DPI | ~10 MB (TIFF) | PNG or TIFF | Small originals need more pixels to enlarge well |
| Panoramic / oversized | 300–400 DPI | Varies | TIFF | Balance detail vs. file size |
600 DPI is the recommended default for most family photo restorations.
My Pre-Scan Checklist
- Clean the scanner glass with a lint-free cloth — dust on the glass shows up as additional marks in your scan.
- Handle the photo by its edges only, or wear clean cotton gloves.
- Place the photo face-down and press it completely flat. Curled corners create shadows that look like damage.
- Scan in color mode even for black-and-white photos — color scans capture more tonal information.
- Save as PNG (lossless) rather than JPEG. JPEG compression introduces artifacts that confuse restoration algorithms.
- Keep the original photo safe after scanning. Never attempt physical cleaning with liquids unless you are a conservator.
Method 1: Remove Scratches from Old Photos Online Free with AI (Recommended)
This is the method I recommend to almost everyone who asks me about photo restoration. It requires no software installation, no technical skills, and no budget. Modern AI restoration tools have been trained on millions of damaged photographs and can identify scratch patterns, distinguish them from intentional image elements like hair or tree branches, and reconstruct the missing content with remarkable accuracy.
Our AI scratch removal tool handles the full process automatically — surface scratches, deep gouges, emulsion cracks, and even scratches that run across faces. Here's exactly how to use it:
Step 1: Upload Your Scanned Photo
Visit the Remove Scratches from Photos page and drag your file into the upload area, or click to browse. The tool accepts JPEG, PNG, and TIFF files up to the supported size limit. If your scan is very large, PNG is preferred over TIFF for upload speed.
Step 2: Let the AI Analyze and Restore
Once uploaded, the AI scans the entire image for damage. It uses pattern recognition to identify scratches and distinguish them from intentional lines in the photo. For each damaged area, it analyzes the surrounding pixels — texture, color gradient, lighting direction — and synthesizes replacement content that blends seamlessly. This typically takes 10–30 seconds depending on image size and damage complexity.
Step 3: Review and Download
Use the before/after slider to compare the original and restored versions. Pay particular attention to faces, fine details, and areas where scratches crossed important content. If you're satisfied, download the high-resolution result. The downloaded file is watermark-free and ready for printing or sharing.
 Before
 After
After
Before and after: AI scratch removal on a vintage portrait — surface marks and emulsion damage fully resolved in seconds.
When AI Works Best
- Surface and mid-depth scratches across any area of the photo
- Scratches running across faces — AI understands facial structure and reconstructs features naturally
- Multiple intersecting scratches that would take hours to fix manually
- Emulsion crack networks across large areas
- Batch restoration when you have many photos to process
The photo restoration community on Reddit's r/photorestoration regularly shares before-and-after examples that show just how far AI tools have come — it's a great place to see real-world results and get a sense of what's achievable with your own photos.
Try It Right Now — It's Free
Upload your scratched photo and see the AI result in under 30 seconds. No signup required.
Remove Scratches FreeMethod 2: Remove Scratches with Adobe Photoshop
Photoshop remains the gold standard for manual photo restoration. If you have a subscription and some patience, it gives you pixel-level control that no automated tool can match. I use it for photos where the AI result needs a final touch — a slightly unnatural texture here, a reconstructed eye that's almost-but-not-quite right there.
The Clone Stamp Method (Best for Isolated Scratches)
- Open your scan and immediately duplicate the background layer (Ctrl/Cmd + J). Never work on the original layer.
- Zoom to 100–200% on the scratch area so you can see individual pixels.
- Select the Clone Stamp tool (S key). Set brush hardness to 0% for soft edges, and opacity to 70–80%.
- Alt-click on a clean area of similar texture near the scratch to set your source point.
- Paint over the scratch in short strokes, re-sampling frequently from different nearby areas to avoid a repetitive pattern.
- Switch to the Healing Brush (J key) for final blending — it automatically matches the texture and tone of the surrounding area.
The Spot Healing Brush (Best for Fine Surface Scratches)
For thin, isolated surface scratches, the Spot Healing Brush (J key, set to Content-Aware mode) is faster than the Clone Stamp. Simply paint over the scratch and Photoshop automatically samples surrounding pixels to fill it. It works best on scratches that don't cross complex areas like faces or fine text.
Pro Tip: Work in Passes
Don't try to fix everything in one pass. Do a first pass with the Spot Healing Brush for all the easy surface scratches, then a second pass with the Clone Stamp for the deeper or more complex ones. This approach is faster and produces more consistent results than trying to handle each scratch individually from start to finish.
Method 3: Remove Scratches for Free with GIMP
GIMP is a free, open-source image editor that offers most of Photoshop's restoration capabilities at zero cost. It's a solid choice if you want manual control but don't have a Photoshop subscription.
- Open your photo in GIMP and duplicate the layer (Layer > Duplicate Layer).
- Select the Heal tool from the toolbox (or press H). Set brush size slightly wider than the scratch.
- Ctrl-click on a clean area near the scratch to set the source point.
- Paint over the scratch. GIMP's Heal tool blends the sampled pixels with the surrounding texture automatically.
- For stubborn areas, switch to the Clone tool (Shift+C) for more direct control.
- Use Filters > Enhance > Unsharp Mask lightly at the end to restore any sharpness lost during healing.
GIMP's main limitation compared to Photoshop is its less sophisticated Content-Aware fill. For complex areas like faces, the AI tool will almost always produce better results with far less effort.
AI vs Photoshop vs GIMP: Which Method Should You Choose?
I get asked this question constantly, and my honest answer is: it depends on your situation. Here's the comparison table I wish someone had given me when I started.
Scratch Removal Method Comparison
| Factor | AI Online Tool | Adobe Photoshop | GIMP (Free) |
|---|---|---|---|
| Cost | Free / low-cost credits | $20–55/month subscription | Free |
| Technical skill needed | None | Intermediate to advanced | Beginner to intermediate |
| Time per photo | 10–30 seconds | 30 min – several hours | 20 min – several hours |
| Scratch over faces | Excellent — AI reconstructs features | Good with skill | Moderate |
| Complex intersecting scratches | Excellent | Good with patience | Moderate |
| Fine surface scratches | Excellent | Excellent | Good |
| Batch processing | Yes | With Actions/Scripts | Limited |
| Result consistency | High — same quality every time | Varies by skill | Varies by skill |
| Best for | Most users, most photos | Professionals, complex cases | Budget-conscious, hands-on users |
For the vast majority of family photo restorations, the AI tool delivers the best results in the least time.
My personal workflow: I start with the AI tool for every photo. If the result is 95%+ perfect, I'm done. If there's a specific area that needs refinement — usually a reconstructed face that looks slightly off — I open the AI result in Photoshop and do a targeted touch-up. This hybrid approach gives me professional-quality results in a fraction of the time pure manual work would take.
Special Case: Removing Scratches Over Faces
Scratches over faces are the most emotionally significant damage in any family photo — and historically, the hardest to fix. A scratch across an eye or mouth used to require a skilled artist and hours of careful work. Modern AI has changed this completely.
AI restoration models are trained on enormous datasets of human faces and understand facial geometry — the relationship between eyes, nose, mouth, and the way light falls across skin. When a scratch removes part of a face, the AI doesn't just clone nearby pixels; it reconstructs the missing feature based on what it knows about how faces look. The results are often indistinguishable from the original.
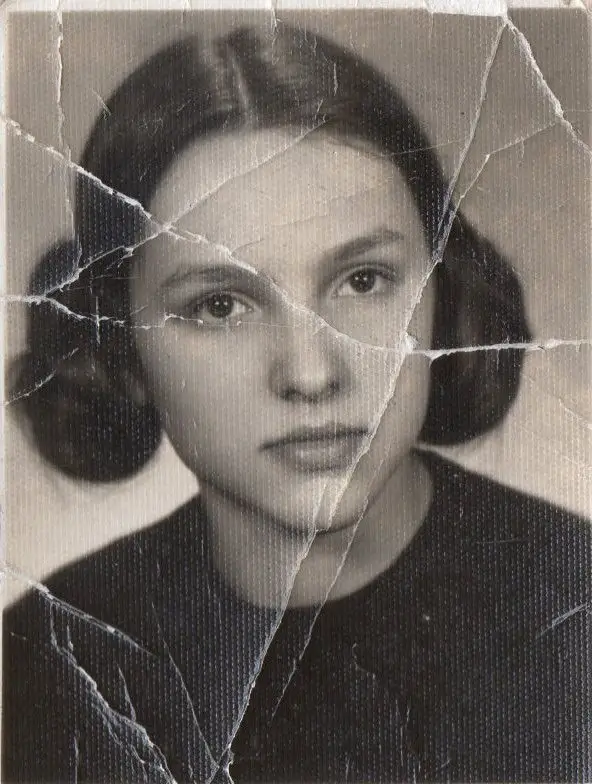
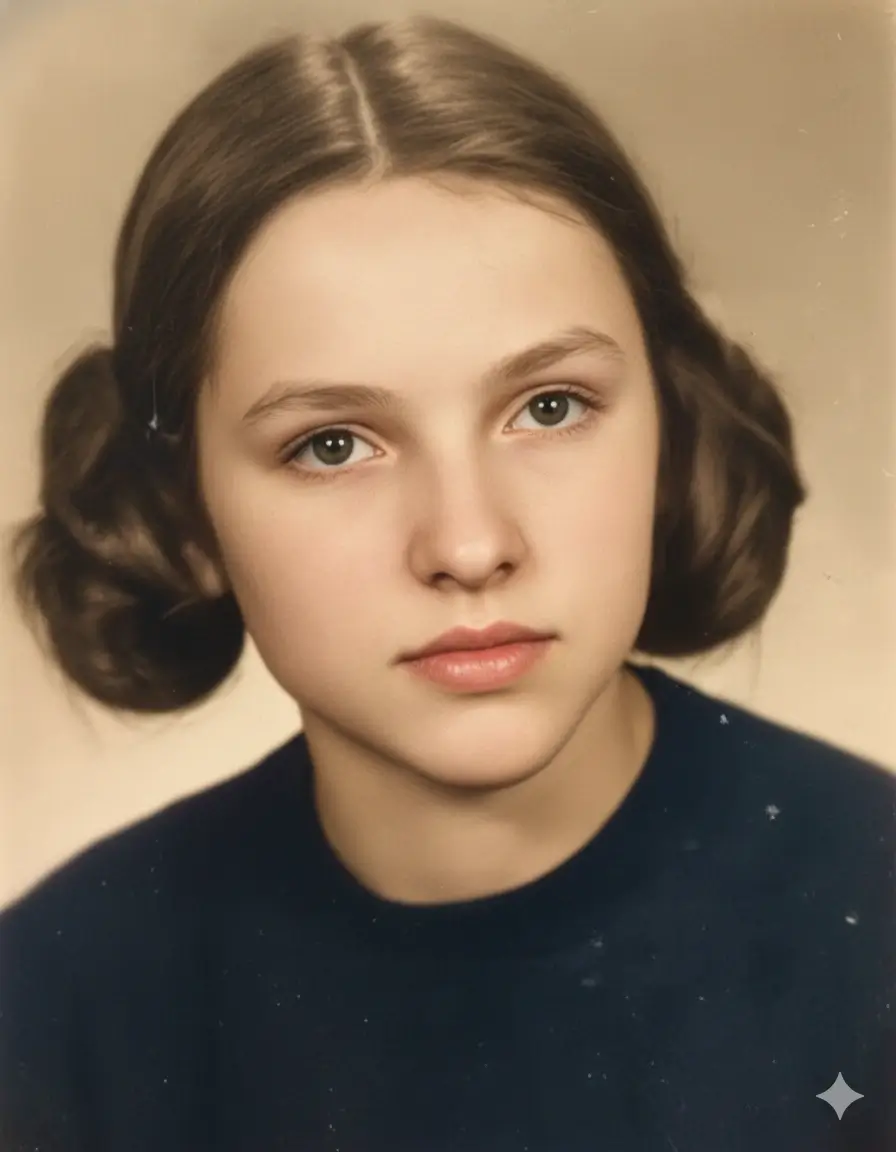
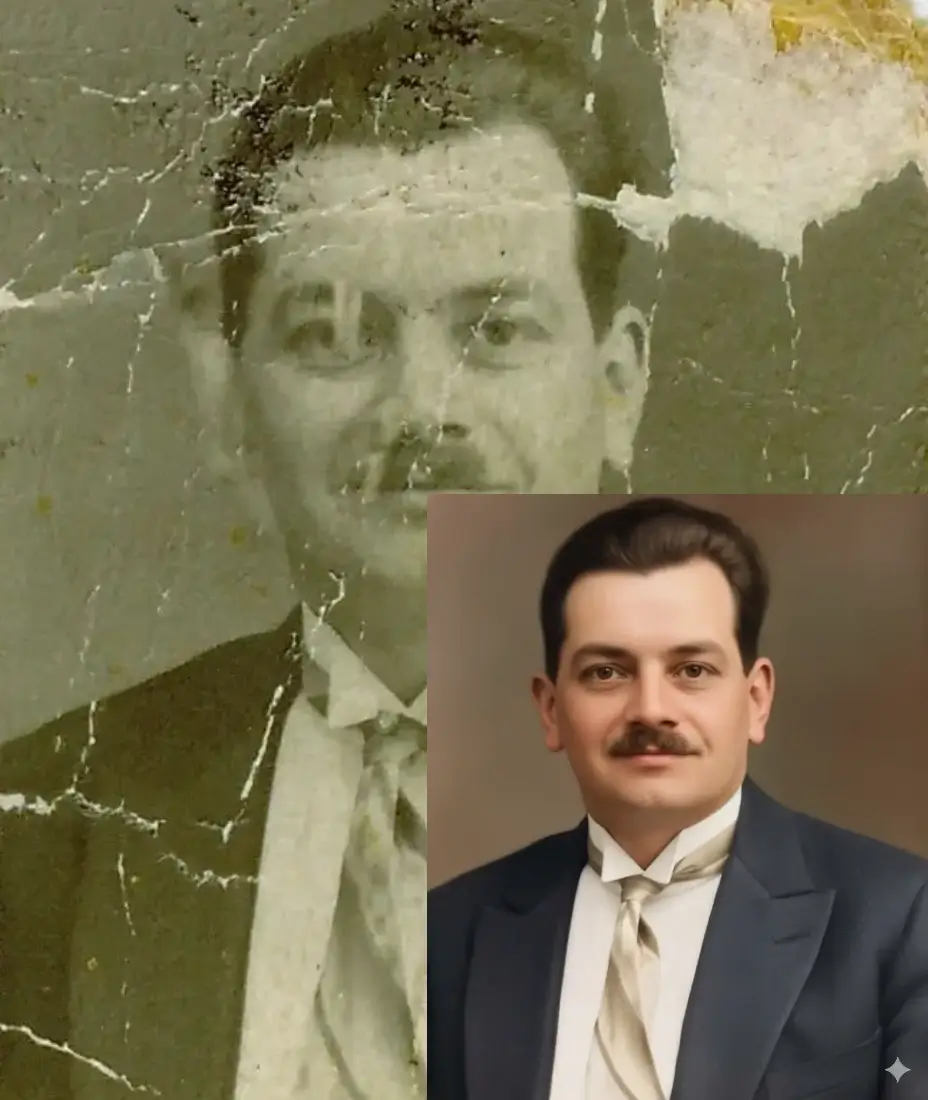
 Before
 After
After
A deep scratch running across the face — one of the hardest cases for manual editing, handled automatically by AI.
Tips for Best Results on Faces
- Scan at 600 DPI minimum — faces need the most detail for accurate reconstruction.
- Crop the photo so the face fills more of the frame before uploading, then composite back if needed.
- If the AI result looks slightly unnatural around the eyes or mouth, a quick touch-up with Photoshop's Healing Brush usually resolves it.
- For group photos where only one face is scratched, the AI can use the other faces in the image as reference for skin tone and lighting.
How to Preserve Your Restored Photos (So This Never Happens Again)
Restoring a photo is only half the job. The other half is making sure it doesn't need restoring again in another 50 years. The Library of Congress guidelines on photographic preservation are the gold standard here, and they're surprisingly practical.
Digital Preservation
- The 3-2-1 rule: Keep 3 copies, on 2 different media types, with 1 copy offsite (cloud storage counts).
- Store master files as PNG or TIFF — never JPEG for archival copies.
- Use descriptive filenames: 1958-wedding-grandparents-restored.png is infinitely more useful than IMG_4521.jpg.
- Back up to cloud storage (Google Drive, iCloud, or Dropbox) and a physical external drive.
- Review and migrate your storage media every 5–7 years — hard drives and USB sticks don't last forever.
Physical Storage for Original Prints
- Use acid-free, lignin-free photo sleeves or envelopes — look for the PAT (Photographic Activity Test) certification.
- Store in a cool, dry, dark location. The ideal is 65–70°F with 30–50% relative humidity.
- Never store photos in basements (too damp) or attics (too hot and cold).
- Separate photos with acid-free interleaving tissue if storing in stacks.
- Keep negatives in a separate location from prints — if one is damaged, you still have the other.
Frequently Asked Questions
Your Scratched Photos Are Not Lost — They're Just Waiting
That wedding portrait of my grandparents now sits in a frame on my mother's bookshelf. The scratch is gone. My grandfather's face is clear and warm, the way she always remembered him. It took less time to restore than it took me to write this paragraph. I think about that every time someone tells me their old photos are "too damaged to fix." They almost never are. Whether you have a single precious portrait or a shoebox full of scratched memories, the tools available today — especially AI restoration — make recovery faster, easier, and more affordable than at any point in history. Start with a good scan, try the AI tool first, and save the manual methods for the cases that need them. And once you've restored your photos, please store them properly. Future generations will thank you. Ready to start? Try our free AI scratch removal tool and see what's possible.